
Best safety practices for solo hiking in the Swiss Alps
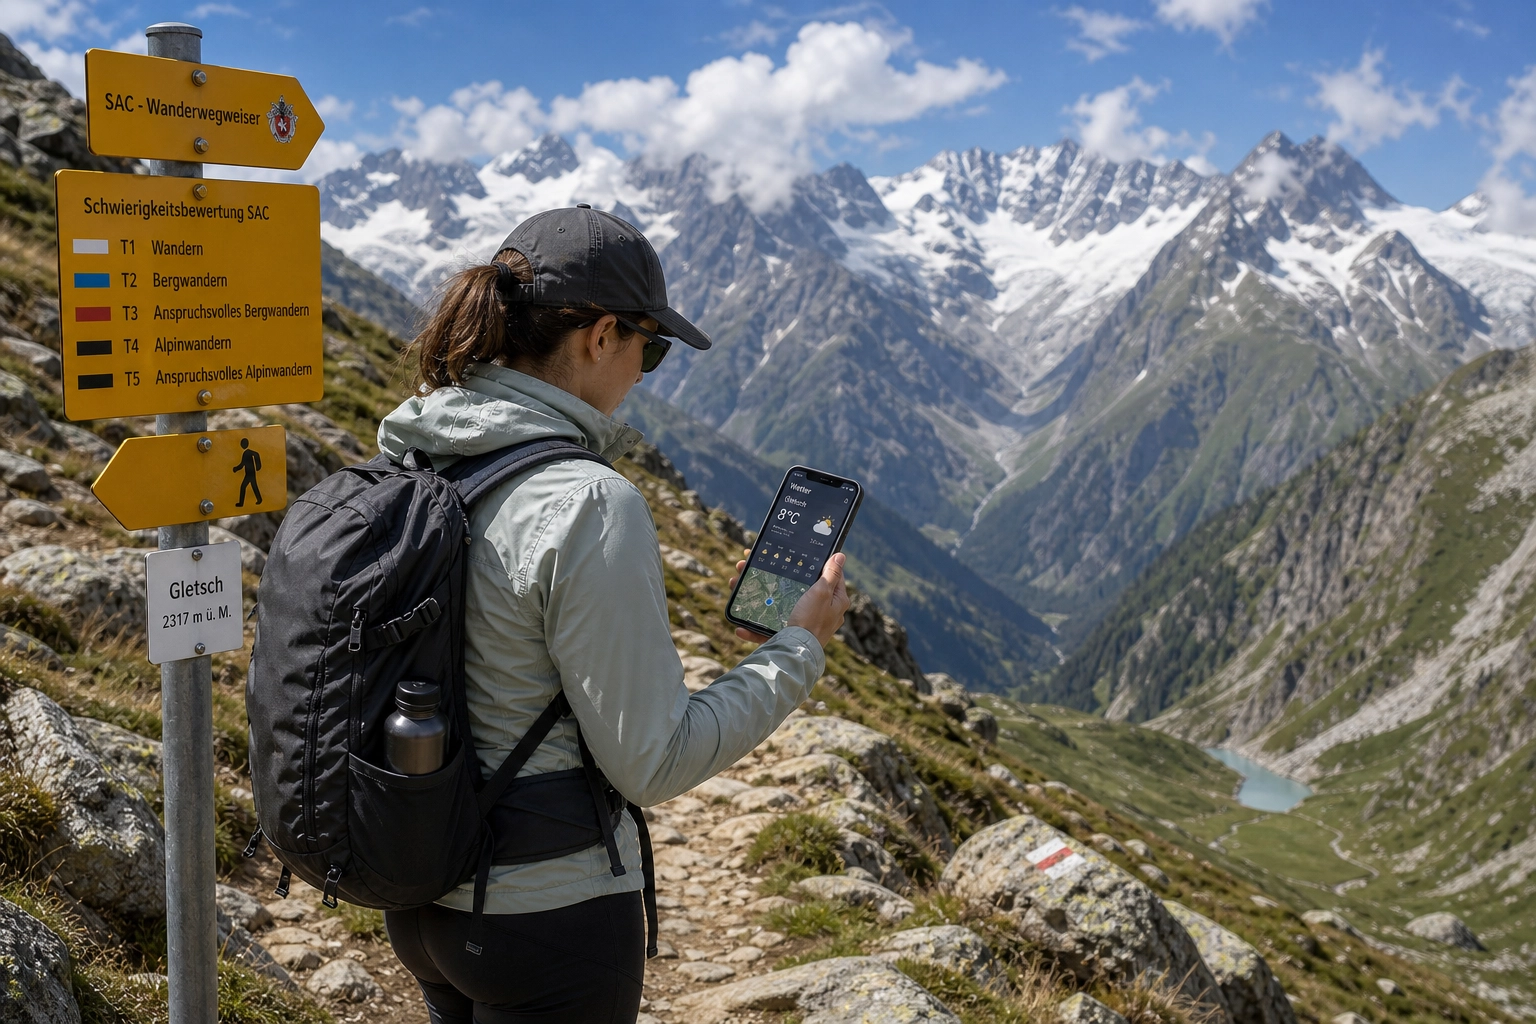
Stepping onto a trail in the Valais or Bernese Alps with only your own backpack and thoughts is one of the most rewarding mountain experiences in Europe. Switzerland boasts over 65,000 kilometers of marked hiking routes, immaculate postal buses, and high-altitude huts serving warm soup at 2,500 meters. This extraordinary infrastructure often creates a dangerous illusion: that alpine hiking here carries no real risk.
Every summer, experienced solo trekkers and eager backpackers misjudge rapid weather shifts, over-rely on mobile phone reception, or mistake a technical mountain route for a casual foothill walk. Hiking alone increases your vulnerability because any minor misstep, like a twisted ankle, a missed turn, or sudden drop in temperature, requires immediate self-reliance.
According to safety recommendations from the Swiss Alpine Club (SAC), thorough route evaluation, objective self-assessment, and structured emergency planning form the foundation of mountain safety. Implementing systematic risk management allows solo hikers to experience total freedom while maintaining a reliable safety net.
Understanding Swiss Trail Markings and the SAC Difficulty Scale
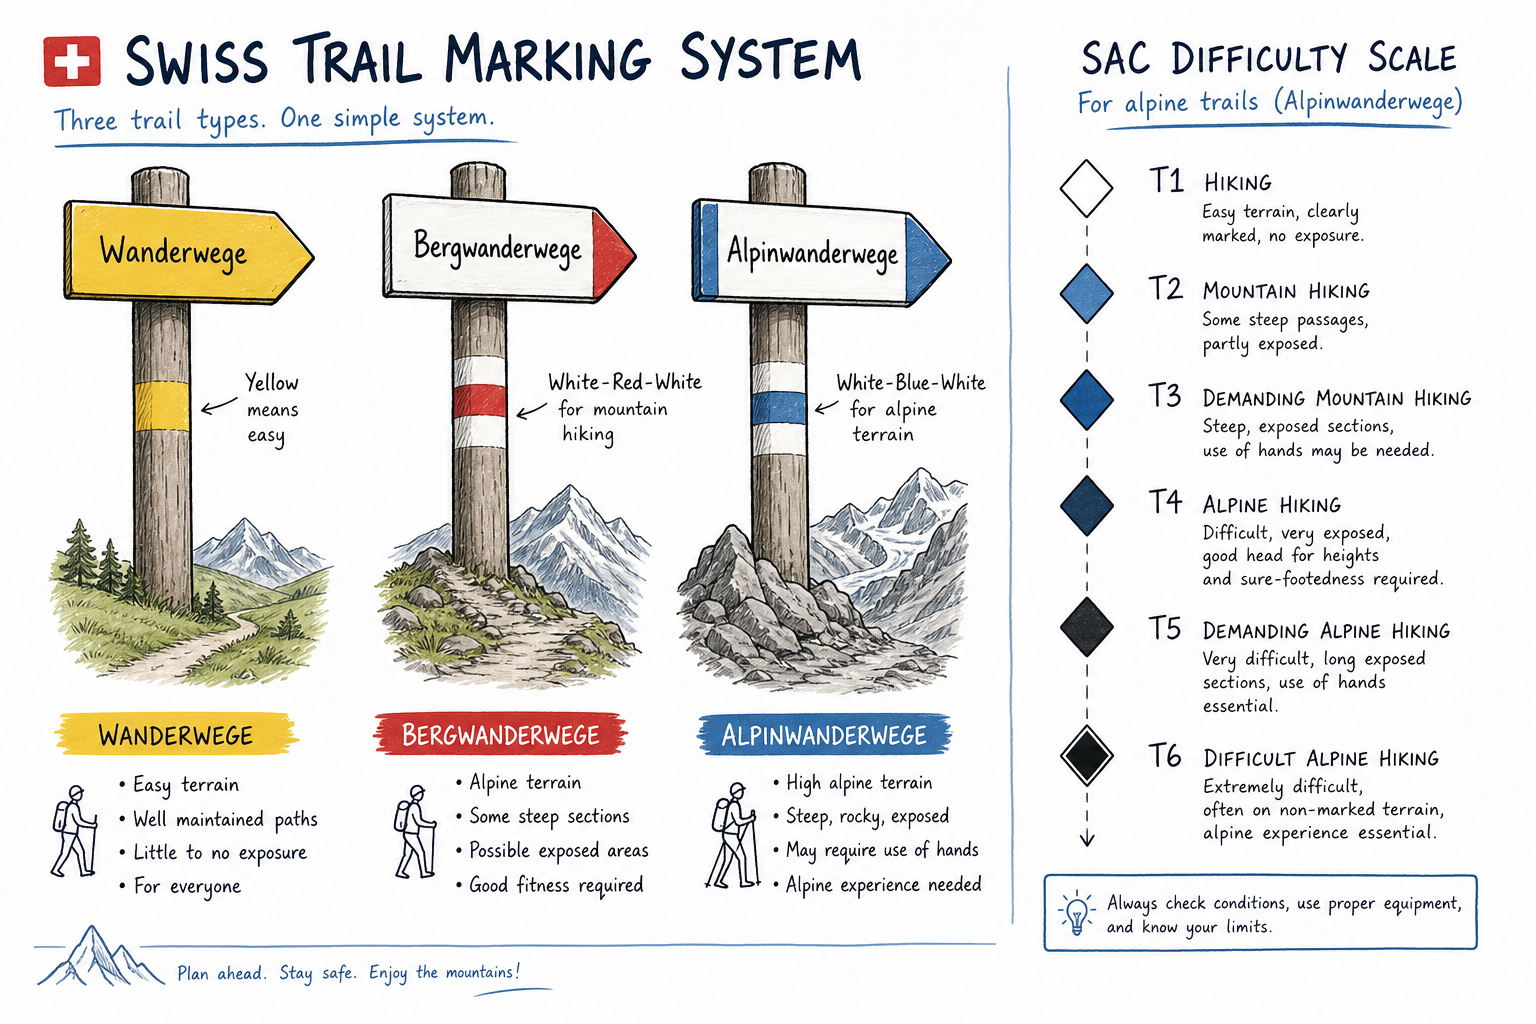
Swiss hiking trails are meticulously categorized and color-coded. Understanding these markings prevents solo hikers from wandering onto terrain that demands technical climbing equipment or advanced alpine experience.
Yellow Trail Markers: Hiking Trails (Wanderwege)
Yellow signs and trail paint designate standard hiking paths. These routes are generally wide, well-maintained, and require no special alpine experience. Slipping hazards are minimal, slopes are manageable, and standard athletic shoes or light hiking boots are usually sufficient. For solo travelers adjusting to high altitudes or testing their stamina, yellow trails offer minimal risk.
White-Red-White Markers: Mountain Trails (Bergwanderwege)
White-red-white painted flashes on rocks and posts mark official mountain hiking routes. Terrain here becomes steep, uneven, and narrow. Exposed sections may feature steel cables or chains for handholds.
On these trails, you need sturdy alpine boots with high ankle support and deep tread soles. According to advice from outdoor specialists on Together in Switzerland, alpine weather shifts rapidly, making proper footwear and layered clothing vital on white-red-white routes. Losing your footing on a steep gravel chute or wet limestone ledge can lead to severe falls.
White-Blue-White Markers: Alpine Routes (Alpinwanderwege)
White-blue-white routes represent serious alpine terrain. These paths often cross glaciers, snowfields, exposed ridges, or scree fields without security cables. Navigational skills, crampons, ice axes, or climbing harnesses are frequently necessary.
Solo hikers should avoid white-blue-white routes unless they hold advanced mountaineering certifications, carry satellite tracking devices, and have extensive experience evaluating avalanche risk and ice bridging.
The SAC Hiking Scale Overview
| SAC Grade | Trail Category | Marking | Terrain Description | Required Equipment & Skill |
|---|---|---|---|---|
| T1 | Hiking | Yellow | Flat or gently sloping; clear path | Basic footwear; basic orientation |
| T2 | Mountain Hiking | Yellow / Red-White | Continuous path; steep sections; fall risk possible | Sturdy hiking shoes; sure-footedness |
| T3 | Challenging Mountain | White-Red-White | Exposed ledges; ropes/chains; scree fields | Ankle-support boots; height head; weather assessment |
| T4 | Alpine Hiking | White-Blue-White | No path in places; exposed rock; steep slopes | Rigid boots; hands needed for balance; route-finding |
| T5 | Demanding Alpine | White-Blue-White | Exposed ridge terrain; simple glaciers | Alpine gear; ice axe; expert avalanche/glacier knowledge |
| T6 | Difficult Alpine | White-Blue-White | High fall exposure; loose rock; serious climbing | Full alpine safety gear; elite mountaineering mastery |
Weather Planning and Microclimates in the Alps
Mountain weather in Switzerland operates on microclimates. A sunny, clear morning in Martigny can transform into a freezing thunderstorm over the Grand Saint Bernard pass by mid-afternoon. Solar radiation heats valley floors, forcing moist air up cold mountain faces where it rapidly condenses into heavy downpours, hail, or dense fog.
Essential Weather Monitoring Tools
Standard phone weather apps rely on broad regional models that miss localized alpine anomalies. Before stepping on any trail, download MeteoSwiss, the national weather service app. It provides high-resolution precipitation radar, wind gust tracking, and localized thunderstorm warnings tailored specifically to Swiss topography.
When reviewing forecasts, check three core metrics:
- Precipitation Probability & Radar Loops: Look for afternoon convection patterns that indicate sudden storm formation.
- Isotherm (Freezing Level): High altitude freezing levels show where rain transitions into wet snow, which makes rock faces extremely slippery.
- Wind Speed at Ridge Levels: High winds compound cold exposure and make narrow, exposed ridges dangerous.
The Afternoon Convection Danger Window
In peak summer (July through August), intense solar radiation builds energy throughout the morning. Cumulus clouds that appear small at 10:00 AM can tower into thunderheads by 2:00 PM.
As a solo hiker, adopt the “Early Start, Early Finish” rule. Aim to cross high passes or exposed ridges before 12:30 PM, reaching your hut, hostel, or valley finish line before peak thunderstorm windows open between 2:00 PM and 5:00 PM.
Digital Safety, Mapping, and Emergency Systems
Mobile coverage across the Swiss Alps is impressive, but deep valleys, limestone gorges, and shadow zones behind high granite walls routinely drop cell signals. Relying solely on cellular data for navigation is a common solo hiking mistake.
Primary Navigation: Swisstopo and Offline Maps
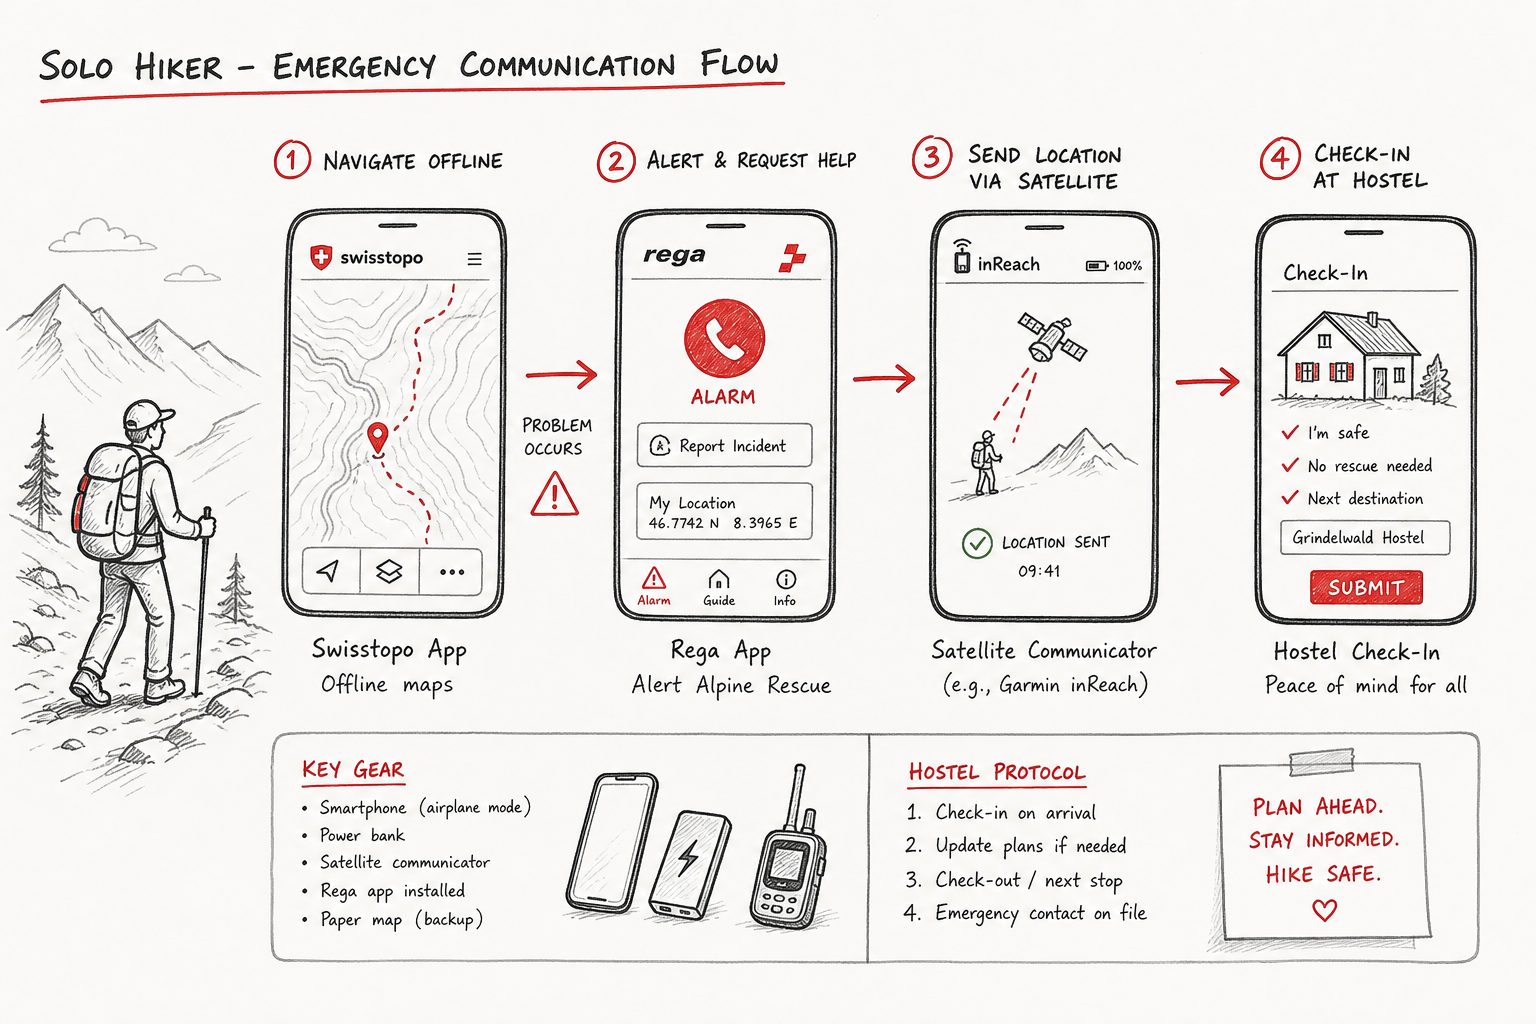
Download the official Swisstopo mobile application. Maintained by the Federal Office of Topography, Swisstopo provides vector-accurate offline topographic mapping at 1:10,000 resolution.
Before departing your base camp, download your target vector tile map for offline use. Mark designated emergency escape points where your route intersects cable car stations, postal bus stops, or mountain huts.
The Rega Emergency App
Swiss Air-Rescue (Rega) operates a dedicated emergency helicopter network across Switzerland. The free Rega App is one of the most effective safety tools available for solo hikers.
- Direct Telemetry Transmission: When you trigger an alarm via the app, it automatically sends your exact GPS coordinates directly to Rega’s emergency operations center.
- Low-Bandwidth Communication: The app utilizes minimized data packets to transmit location coordinates even when standard voice network signal strength is too weak to make a normal phone call.
- Test Alarm Functionality: You can run connection checks to verify that your location permissions and satellite links are active before heading into remote terrain.
Satellite Communicators for Remote Valleys
If you plan to hike multi-day routes across high, isolated passes like those found in Valais or near the Mont Blanc massif, bring a dedicated satellite messenger such as a Garmin inReach or ZOLEO. These devices operate on global satellite networks independent of cellular coverage, allowing bidirectional text communication and continuous live tracking for emergency contacts back home.
The Solo Hiker Check-In Protocol
Never start a trail without establishing an active check-in protocol. Share your exact GPX route, planned departure time, estimated arrival time, and a hard deadline for emergency notifications with a designated contact.
If you are staying at a social hostel or alpine base camp, inform the reception staff of your planned route before leaving in the morning. When staff know your itinerary, missing your return time triggers an immediate local check long before nightfall.
Solo Gear Essentials and Layering Strategies
Carrying too much gear causes fatigue and increases slip risk, while under-packing leaves you vulnerable to hypothermia if weather conditions suddenly deteriorate. Building an efficient, modular packing system is essential for solo alpine travel.
For a complete breakdown of gear weight, clothing selection, and packing efficiency, review our full guide on Swiss Alps Summer: A Simple 5-Step Packing Guide.
Alpine Layering Matrix
[ Base Layer: Merino Wool / Synthetic ]
       │  (Wicks moisture away from skin during steep climbs)
       ▼
[ Active Mid-Layer: Fleece or Lightweight Grid ]
       │  (Traps body heat while remaining breathable)
       ▼
[ Insulation Layer: Compressible Down / Synthetic Jacket ]
       │  (Keeps you warm during summit breaks or emergency stops)
       ▼
[ Outer Shell: 3-Layer Waterproof Gore-Tex ]
          (Blocks driving wind, hail, and torrential rainfall)
The Solo Emergency Kit Checklist
Every solo hiker’s backpack should contain an emergency survival kit regardless of trail difficulty or duration:
- Emergency Bivy Sack (Bivouac Bag): A windproof, waterproof silver reflective foil bag weighing under 150 grams. If you break an ankle and must sit on cold rock for two hours awaiting rescue, a bivy sack prevents life-threatening hypothermia.
- First Aid Kit: Elastic bandages, sterile gauze, blister treatment dressings (Compeed), surgical tape, tweezers, anti-inflammatory medication, and antiseptic wipes.
- Multi-Tool with Blade and Scissors: Useful for gear repair, cutting tape, or adjusting trekking poles.
- High-Lumen Headlamp (with USB-C charging): Daylight drops rapidly behind high mountain peaks. Finding a trail in total darkness without hands-free lighting is extremely hazardous.
- Compact Power Bank (10,000 mAh): Cold alpine temperatures drain smartphone batteries quickly. Keep your phone and satellite tracker charged in an interior fleece pocket.
- Emergency Whistle: Three sharp blasts on an international emergency whistle carry much further through valley winds than human voices.
Terrain Hazards: Navigating Bisses, Scree, and Exposed Ledges
Swiss topography presents specific environmental hazards that require focused attention, particularly when hiking without a partner to assist or guide you.
Historical Bisse Trails
In the Valais region, historical irrigation channels called bisses route meltwater along steep rock walls. Routes like the OutdoorActive Bisse du Ro offer dramatic views across deep gorges, but feature narrow wooden walkways bolted directly into sheer cliffs.
When traversing exposed bisse paths:
- Maintain three points of contact along handrails or rock faces.
- Use short, controlled steps and keep your center of gravity low over your feet.
- Unbuckle your backpack waist belt on narrow cliff steps. If you lose balance or slip, detaching your heavy pack prevents it from pulling you backward off the ledge.
Crossing Scree Fields and Boulder Fields
Scree consists of loose, marble-sized gravel resting on hard bedrock, while talus fields contain large, unstable boulders. Both present slipping and rolling hazards.
When descending scree, plant your heels firmly and lean forward slightly over your knees. Leaning backward causes your feet to shoot out from underneath you. Maintain active pressure on your trekking poles placed slightly ahead of your stride.
If you dislodge a loose boulder that begins rolling down toward lower trail sections, yell “ROCK!” or “STEINE!” at maximum volume to warn hikers below.
Early Summer Snowfields
Even in July, high alpine passes above 2,200 meters retain steep patches of hard snow. Crossing frozen snow slopes without proper gear is one of the leading causes of fatal solo slipping accidents.
Before entering a snowfield, evaluate the runout area below. If the snow slope terminates in a cliff drop or boulder field, do not cross without crampons and an ice axe. If the runout ends gently in a flat grassy meadow, kick deep step platforms into the snow using the edges of your stiff boot soles, planting your trekking poles firmly with every step.
Hut Safety and Lodging Strategies for Solo Travelers
Where you sleep and base your trek plays a direct role in your overall safety. Staying in well-managed accommodation provides a built-in safety net, local knowledge, and reliable trail updates.
Mountain Huts vs. Base-Camp Social Lodges
While high-altitude SAC mountain huts provide overnight shelter along remote pass routes, organizing multi-day hut itineraries as a solo traveler requires significant planning, advance reservations, and rigid scheduling. If bad weather closes a high pass, missing your reserved hut bed creates severe logistical complications.
An alternative strategy for solo trekkers is establishing a central base camp at a valley lodge or social hostel, then executing targeted day hikes onto nearby mountain networks.
Staying in a social lodge combines budget-friendly accommodations with daily access to up-to-date trail advice, route planning help, and easy connections with other hikers. Compare the advantages of base-camp lodges against conventional options in our article on Hotels in Swiss Mountains? Why Social Lodges Beat Luxury.
If you are planning multi-day point-to-point routes across high passes, read our dedicated checklist on How to Plan Hut to Hut Hiking in Switzerland (7 Tips).
Accommodation Safety Advantages
| Lodging Strategy | Safety & Logistical Advantages | Risk Factors & Considerations |
|---|---|---|
| High Alpine SAC Huts | • Puts you high on the mountain early<br>• Hut keepers monitor pass conditions<br>• Immediate emergency shelter | • Rigid reservation schedules during bad weather<br>• Dormitory noise causes fatigue<br>• Limited water and cell coverage |
| Valley Social Lodges / Hostels | • Flexibility to change routes based on weather<br>• Daily check-in system with staff<br>• Secure gear storage & comfortable recovery | • Requires daily transit to trailheads<br>• Must monitor afternoon valley return times |
| Solo Hotel Isolation | • Total privacy and quiet recovery | • No active trail check-in system<br>• Minimal interaction with local mountain experts |
Decision-Making Framework: When to Turn Back
Solo hikers face psychological pressure to complete planned routes. Without a hiking partner to bounce ideas off of, fatigue and commitment bias can lead to poor choices high on a mountain.
The Real-Time Evaluation Matrix
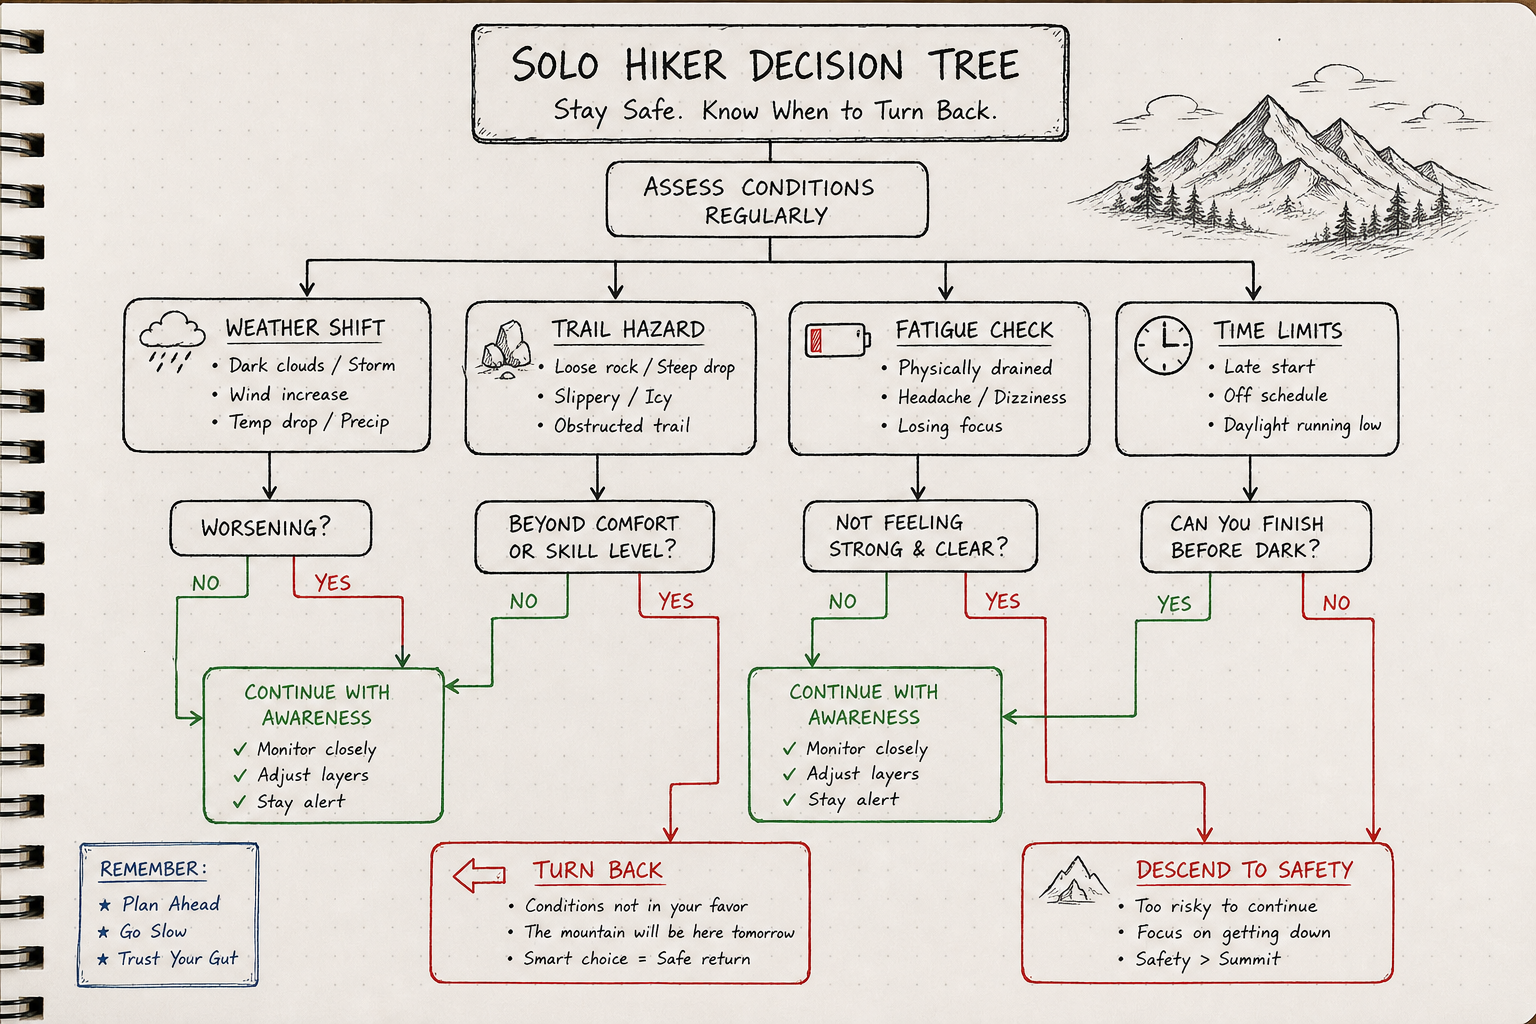
Use this decision framework whenever you encounter unexpected hazards or changing conditions along your route:
[ START ROUTE EVALUATION ]
         │
         ├──► Weather Warning (Thunderstorm clouds forming / Temperature dropping)
         │      └─► ACTION: Retreat immediately to nearest hut or valley exit.
         │
         ├──► Trail Hazard (Snowfield over cliff runout / Damaged cable handhold)
         │      └─► ACTION: Do not bypass exposure. Turn back to trail junction.
         │
         ├──► Physical Strain (Severe knee fatigue / Dizziness / Dehydration)
         │      └─► ACTION: Stop, refuel, and take nearest cable car or bus down.
         │
         └──► Time Margin Deficit (Behind schedule by > 45 minutes at high pass)
                └─► ACTION: Abort summit attempt. Divert to valley escape route.
A Practical Solo Scenario: Retracting from High Passes
Consider a solo trekker ascending toward a 2,500-meter pass in the Valais Alps. By 11:30 AM, dark convective clouds begin gathering over neighboring peaks, and cold gusts blow down the valley wall. The hiker is still 45 minutes below the pass summit, feeling knee fatigue from steep elevation gains.
- Incorrect Choice: Pushing harder to reach the pass before the storm hits, hoping conditions hold on the far descent.
- Correct Safety Choice: Applying the decision matrix. Reversing course down the known trail, reaching a forest shelter, and taking a local postal bus back to base camp.
Turning back requires discipline, but preserving your safety ensures you live to hike another day.
Mitigating Isolation: Joining Social Groups and Guided Weeks
Solo travel does not mean you have to be entirely alone on the mountain. Combining independent solo hiking days with organized social weeks or guided group options gives you the ideal balance of autonomy, company, and safety.
Balancing Autonomy with Group Safety
For solo travelers, backpackers, and digital nomads, joining organized group hiking weeks eliminates the stress of arranging logistics, route checking, and transport. Packages that combine lodging, daily trail transfers, and organized group routes ensure you are never stranded without support.
At Hiking Hostel, core summer hiking trips are based around base camps in Liddes and St. Stephan. These base locations offer accessible routes through Valais, alongside organized excursions to iconic alpine destinations like Aosta, Chamonix/Mont Blanc, Interlaken, and Glacier 3000/Gstaad.
Joining structured social trips provides built-in safety advantages:
- Built-in Trail Companions: Hike with like-minded outdoor enthusiasts without needing to arrange your own group.
- Expert Local Guidance: Experienced guides manage trail selection, weather monitoring, and navigation.
- Seamless Daily Logistics: Scheduled trail transport ensures you get to and from trailheads safely.
To explore how group dynamics enhance solo safety, read our guide on Guided Hiking in Switzerland: Finding Your Social Group.
If you are traveling on a budget and want to keep costs manageable while maintaining safety, check our guide on 7 Tips for Hiking in Switzerland (Without the High Cost).
Evaluating Iconic Solo Routes
When choosing trails for solo hiking, look for routes that offer clear markings, accessible escape points, public transit connections, and reliable mountain huts.
Recommended Regional Solo Routes
- Valais Regional Routes (Near Mont Blanc & Liddes): Routes in lower and mid-Valais offer exceptional views of high granite peaks with accessible valley exits. Discover prime trail choices in our overview of the 5 Best Hiking Trails in Switzerland Near Mont Blanc.
- The Swiss Jura Fold Trails: Trails like the route between Welschenrohr and Günsberg on AllTrails offer beautiful ridge hiking with low avalanche and rockfall hazards, making them excellent choices during early summer or shoulder seasons.
- Valais Alpine Valleys: Trails such as the route between Binn and Grengiols on AllTrails take you through traditional alpine valleys with clear trail markings and reliable rail connections.
For day trips crossing international borders into neighboring alpine regions, review our article on Skiing in the Italian Alps? Try This Aosta Day Trip.
Frequently Asked Questions (FAQ)
Is solo hiking in the Swiss Alps safe for beginners?
Yes, provided beginners stay strictly on yellow (Wanderwege) or basic red-white-red (T2 mountain) marked trails, start early in the day, monitor the MeteoSwiss weather forecast, and carry proper gear. Beginners should avoid white-blue-white alpine trails and high-exposure ridges.
Do I need emergency air rescue insurance in Switzerland?
Yes. Standard travel insurance policies often exclude high-altitude search and rescue costs. Becoming a donor-member of Rega (Swiss Air-Rescue) or purchasing an alpine-specific rescue policy (such as SAC membership or Air-Glaciers coverage) ensures air rescue costs are covered in an emergency.
What should I do if mobile signal fails during an emergency?
First, try dialing 112, the international emergency number. In Switzerland, emergency 112 calls will automatically route through any available cellular network operator, even if your personal provider has no coverage. If cell signal is completely absent, use the Rega App or launch an emergency SOS signal on your satellite messenger.
Is wild camping legal while solo hiking in Switzerland?
Wild camping is strictly prohibited in Swiss National Parks, nature reserves, game reserves, and designated wildlife protection zones. Above the tree line in non-restricted alpine zones, single-night emergency bivouacking is generally permitted, but local municipal laws vary. Always check local cantonal regulations or stay in established hostels, campsites, or mountain huts.
Final Checklist for the Solo Swiss Alpine Hiker
Before stepping onto any Swiss trail alone, complete this quick final safety pass:
- [ ] Downloaded Offline Topographic Maps: Swisstopo vector tiles stored locally on your device.
- [ ] MeteoSwiss App Checked: Localized radar loops verified for afternoon convection storms.
- [ ] Rega App Installed & Tested: GPS permissions active and location services enabled.
- [ ] Route Shared with Contact: GPX route and firm check-in deadline given to hostel staff or a trusted friend.
- [ ] Emergency Kit Packed: Thermal bivy sack, headlamp, multi-tool, power bank, and full first aid kit in your pack.
- [ ] Footwear & Trail Match Verified: Sturdy, deep-tread boots selected for red-white-red mountain terrain.
- [ ] Early Departure Confirmed: On the trail early to pass high exposed points well before afternoon weather shifts.
By matching proper preparation with modern digital safety tools, solo hikers can safely experience the incredible beauty, quiet trails, and unforgettable mountain vistas of the Swiss Alps.