
Best beginner Swiss Alps hiking trips with planned routes
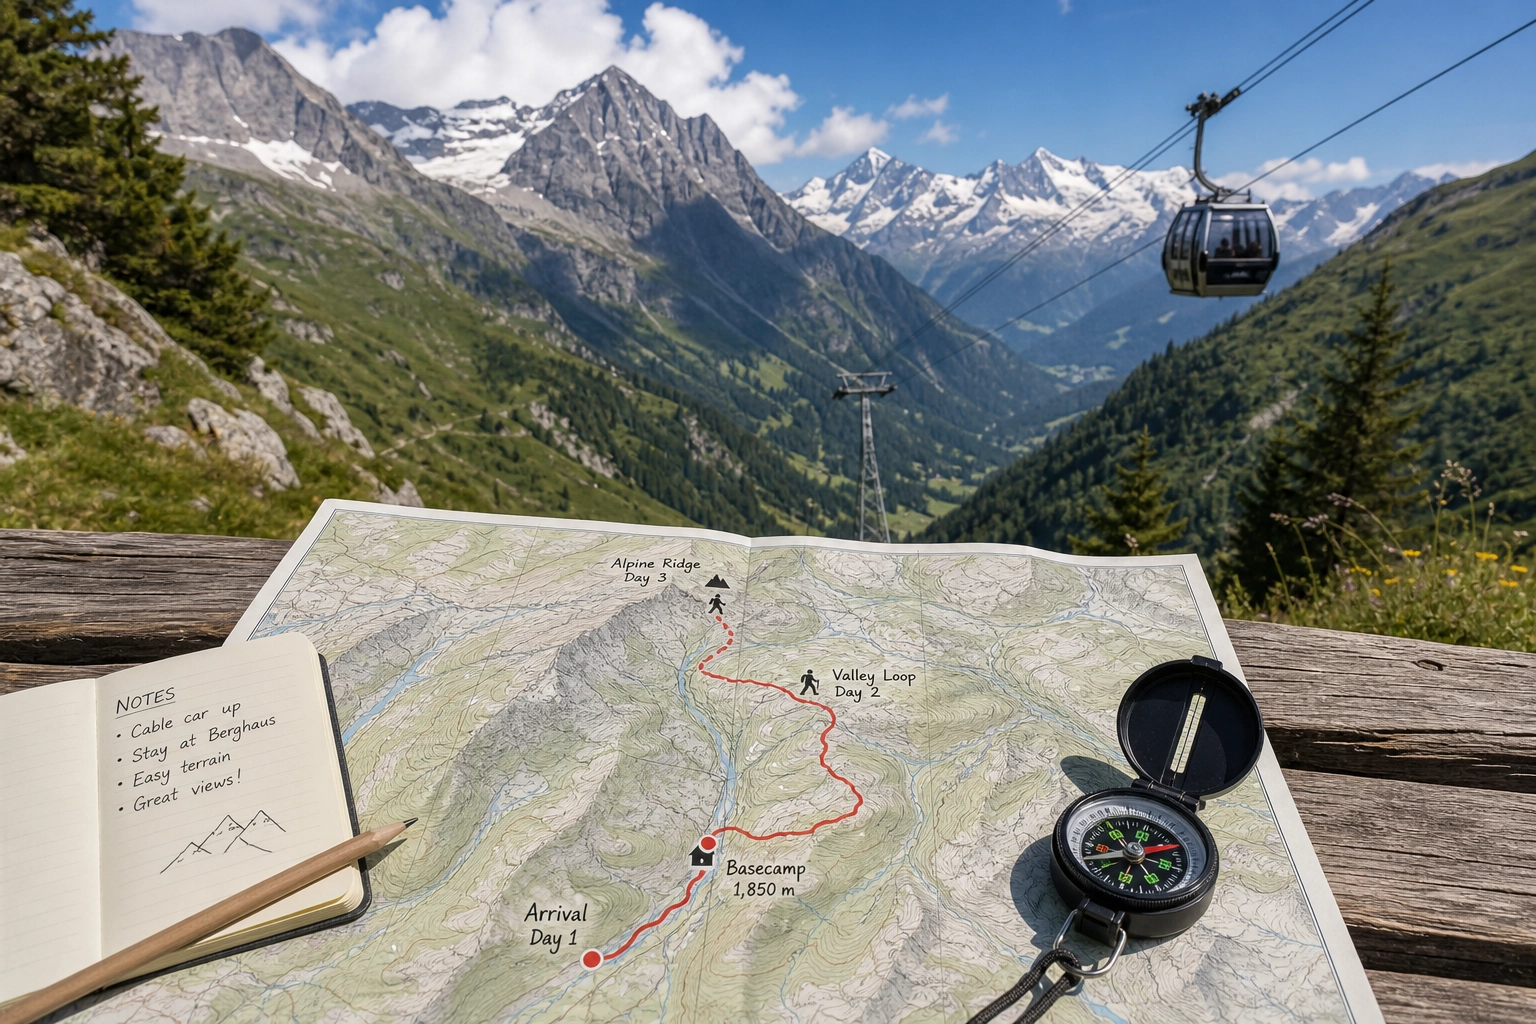
When most people picture hiking in the Swiss Alps, they envision sheer cliff drops, massive crampons, and grueling 4,000-meter ascents. This misconception keeps countless outdoor enthusiasts from experiencing one of the most spectacular mountain ranges in the world. The reality is entirely different. Switzerland features an infrastructure explicitly designed to make the high alpine accessible to anyone who can walk comfortably on uneven ground.
Switzerland is incredibly beginner-friendly because of its world-class network of cable cars, funiculars, cogwheel trains, and meticulously signposted trails [1]. You can experience dramatic alpine scenery, pristine lakes, and cozy mountain huts without enduring grueling, high-risk climbs. The secret lies not in your fitness level, but in how you plan your route.
For solo travelers, budget-conscious backpackers, and digital nomads, creating beginner-friendly Swiss Alps hiking trips with planned routes means leveraging basecamps, understanding transport hacks, and utilizing well-trodden paths where logistics are streamlined. If you want to skip the logistics entirely, guided hiking in Switzerland with social groups is an increasingly popular way to conquer the mountains safely and affordably.
Here is your definitive guide to structured, beginner-friendly alpine routes, complete with daily itineraries, transport strategies, and basecamp recommendations.
Why the Swiss Alps Are Surprisingly Beginner-Friendly
The Swiss have spent over a century engineering ways to get people into the mountains. This means you do not need to be a seasoned mountaineer to reach panoramic viewpoints.
The Cable Car “Hack”
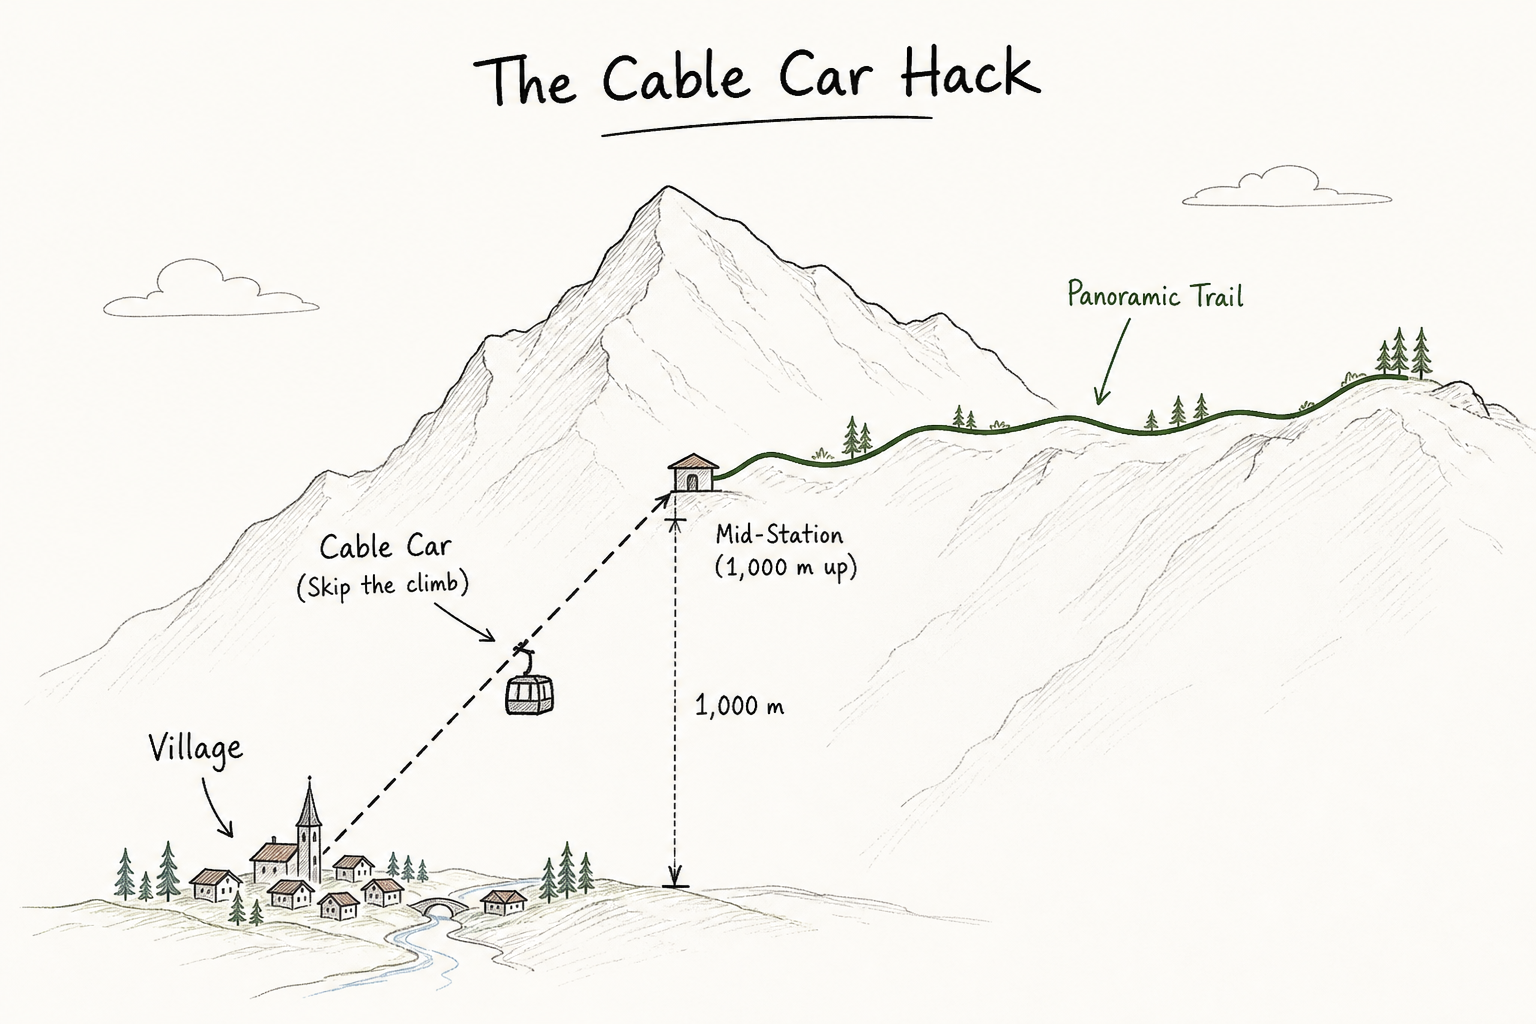
The biggest barrier to alpine hiking is elevation gain. Climbing 1,000 meters (3,280 feet) vertically is an exhausting endeavor that requires specific athletic training. Switzerland eliminates this barrier. Almost every major valley features gondolas or cogwheel trains that ferry you up the initial 1,000 to 1,500 meters of elevation.
By taking a cable car to the top station, you can start your hike already above the treeline. From there, you follow gently undulating trails along high ridges or opt for a scenic, knee-saving descent back into the valley.
Foolproof Trail Signage
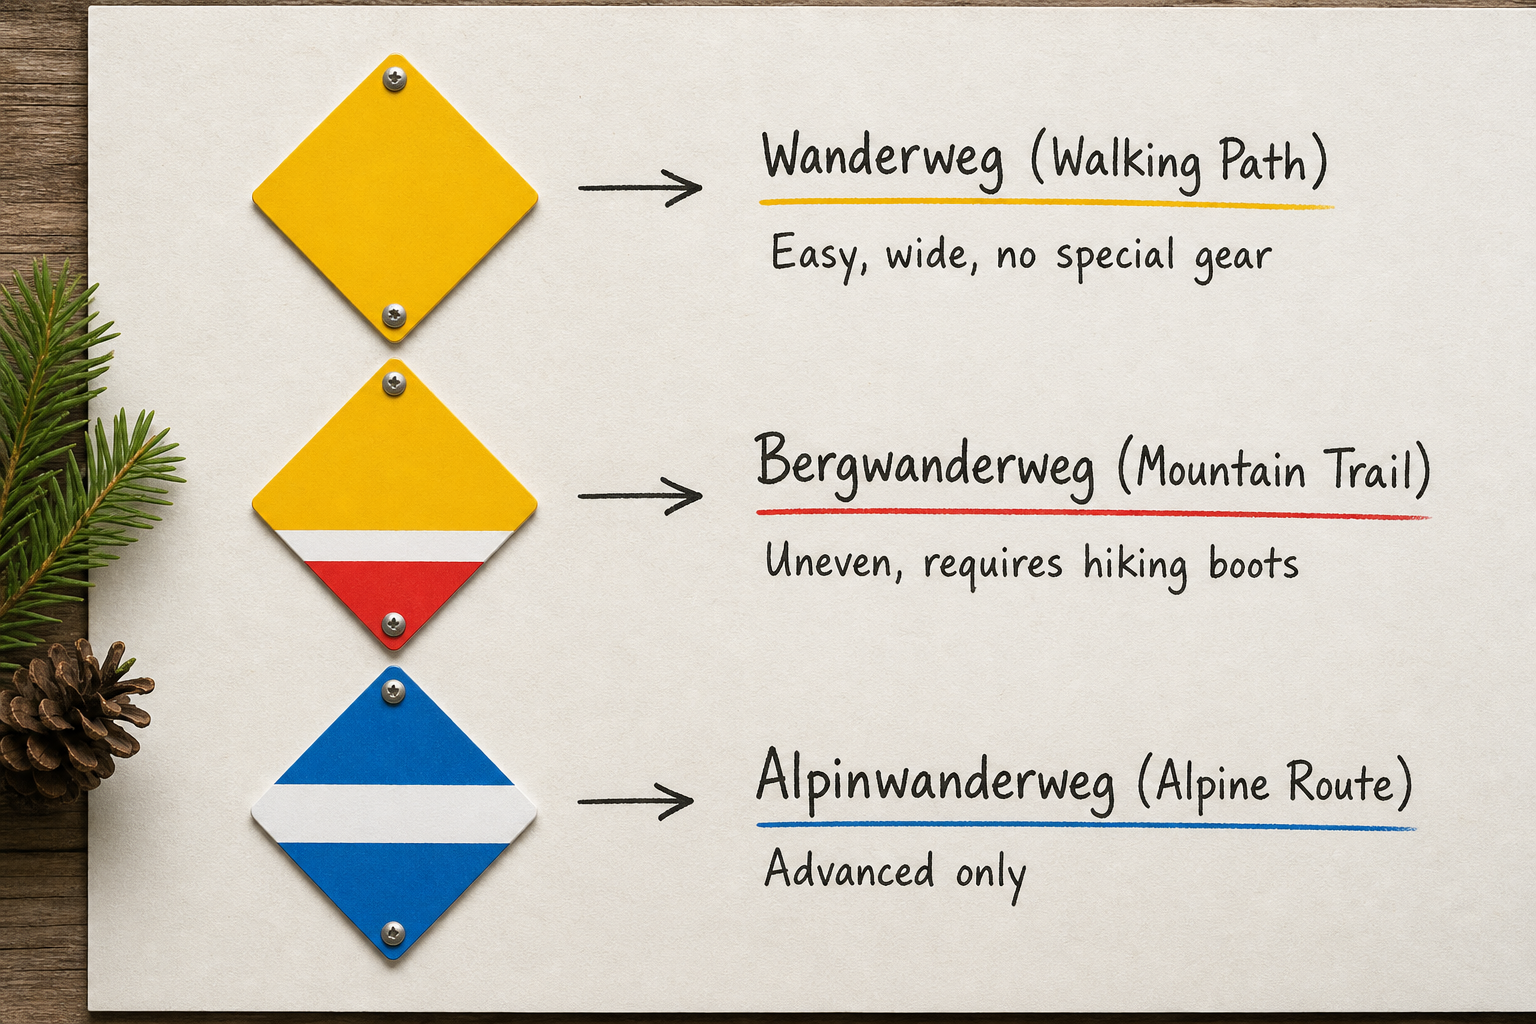
Navigation in the Swiss Alps is incredibly straightforward. Trails are well signed out and heavily traveled during the summer months [5]. The Swiss hiking network uses a universal color-coded system that leaves zero ambiguity about what lies ahead:
- Yellow Signs (Wanderweg): These are standard walking paths. They are wide, relatively flat, and often paved or packed gravel. You can walk these in sturdy sneakers. No special skills are required.
- Red-and-White Signs (Bergwanderweg): These are mountain trails. They involve uneven terrain, rocks, roots, and steeper sections. You need proper hiking boots with good grip. While they require more effort, beginner-friendly red-and-white trails do not involve rock climbing or sheer exposure.
- Blue-and-White Signs (Alpinwanderweg): Avoid these as a beginner. These are alpine routes that may require crossing glaciers, scrambling over boulders, using fixed ropes, and carrying specialized gear.
High-Frequency Public Transport
The Swiss Federal Railways (SBB) and the PostBus network integrate seamlessly with trailheads. If an itinerary suggests a 15-kilometer hike but you run out of energy at kilometer 10, there is a very high probability you can walk to the nearest village and catch a yellow PostBus back to your hostel. This built-in safety net is invaluable for beginners testing their stamina.
The Core Components of a Beginner Itinerary
Before diving into specific routes, it helps to understand how to structure your week. Beginners often make the mistake of attempting a fast-paced, multi-day hut-to-hut trek right out of the gate. While rewarding, carrying a heavy pack over high mountain passes for consecutive days is physically punishing.
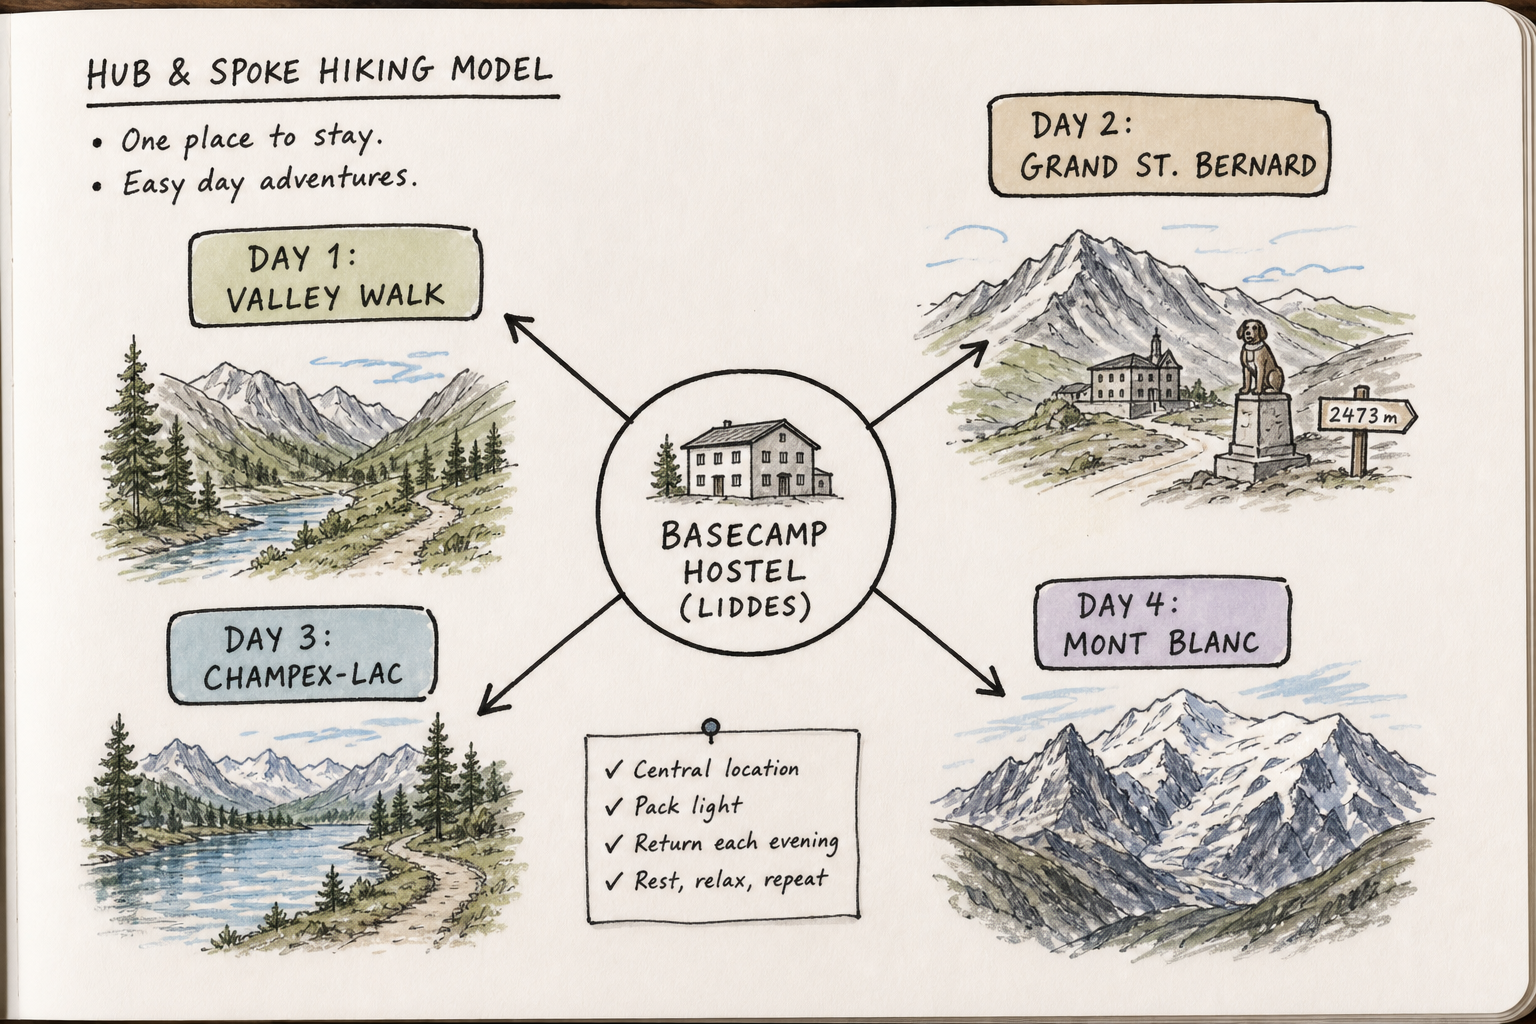
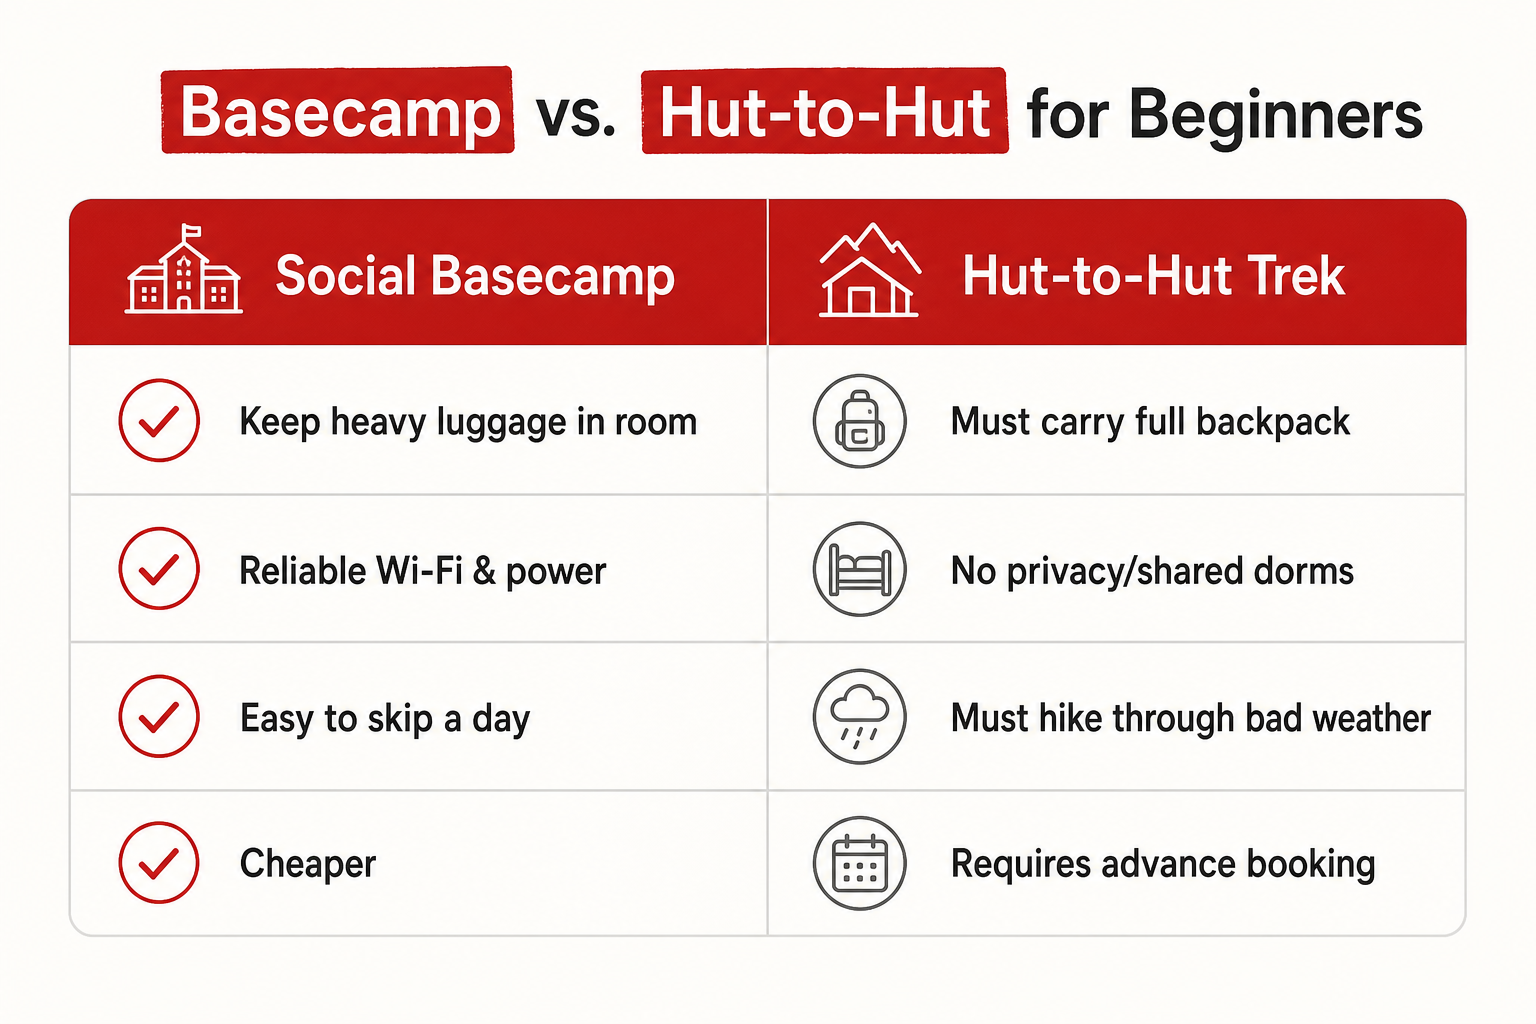
The superior model for beginners is the “hub-and-spoke” basecamp approach. You book a bed in a social mountain lodge, leave your heavy luggage in your room, and take day trips using light daypacks.
Basecamps vs. Hut-to-Hut
Establishing a basecamp offers distinct advantages for novice hikers. You have a guaranteed comfortable bed, reliable Wi-Fi for checking weather apps, access to hearty meals that you do not have to cook, and the flexibility to take a rest day if a storm rolls in.
For those on a budget, social lodges in the Swiss mountains provide a communal atmosphere where you can swap trail beta with other travelers, split the cost of excursions, and form groups for the next day’s hike.
If you do want to attempt a multi-day trek, learning how to plan hut to hut hiking in Switzerland involves booking months in advance and carefully managing your pack weight.
Trip 1: The Valais & St. Bernard Pass (The Quiet Alpine Route)
Best for: Escaping the massive crowds, historic alpine routes, and budget-conscious backpackers.
Basecamp: Liddes (Valais region).
Duration: 5 Days
The Valais region is home to some of Switzerland’s highest peaks, but it also harbors quiet, accessible side valleys perfect for beginners. Basing yourself in a village like Liddes gives you direct access to the Pays du St-Bernard region, which offers authentic Swiss charm without the overwhelming tourist density of Zermatt or Grindelwald. This is a core area for organized social hiking holidays because the logistics are clean and the scenery is immense.
Day 1: The Liddes to Bourg-St-Pierre Warm-Up
Start your trip with a low-stakes valley walk to acclimate to the alpine air.
- The Route: Follow the historical Via Francigena route from Liddes up the valley to the village of Bourg-St-Pierre.
- Trail Type: Yellow (Wanderweg).
- Distance/Time: 7 kilometers / 2.5 hours.
- Elevation Profile: Gentle, rolling ascent of roughly 300 meters.
- Why it works: This path winds through dense pine forests, past old stone chapels, and along the Dranse river. It is completely safe, impossible to get lost on, and finishes in a village where you can catch the local bus back to Liddes.
Day 2: Grand St. Bernard Pass (The Italian Border)
Experience high alpine drama with zero climbing by letting the bus do the work.
- The Route: Take the morning PostBus from Liddes all the way up the winding mountain road to the Great St. Bernard Pass at 2,469 meters. Hike around the alpine lake, visit the historic hospice, and cross the border into Italy on foot.
- Trail Type: Yellow and easy Red/White.
- Distance/Time: 4 to 6 kilometers / 2 hours exploring.
- Why it works: You get the sensation of being deep in the rugged, rocky high Alps without having to hike up 1,000 vertical meters. You can hike the trails surrounding the hospice, view the famous St. Bernard rescue dogs, and enjoy a coffee in Italy before catching the afternoon bus down.
Day 3: Champex-Lac to Relais d’Arpette
Champex-Lac is often called “Little Canada” due to its pristine alpine lake surrounded by dense evergreen forests.
- The Route: Walk the perimeter of Champex-Lac, then take the gentle ascending trail up the Val d’Arpette to the Relais d’Arpette mountain hut.
- Trail Type: Easy Red/White.
- Distance/Time: 8 kilometers round trip / 3 hours.
- Elevation Profile: 150 meters up, 150 meters down.
- Why it works: The Val d’Arpette is a classic U-shaped glacial valley. The trail is wide and steadily graded. The payoff is reaching the Relais d’Arpette hut, where you can eat a slice of fresh blueberry tart on the terrace while looking up at the jagged Clochers d’Arpette peaks.
Day 4: Excursion Day – Chamonix & Mont Blanc
One of the massive benefits of basing in the Valais is proximity to the French border.
- The Route: Join an organized transport or take the train across the border to Chamonix, France.
- Action: Take the Aiguille du Midi cable car up to 3,842 meters for face-to-face views of Mont Blanc. Afterward, walk the flat, beginner-friendly Petit Balcon Sud trail along the Chamonix valley floor.
- Why it works: Seeing Mont Blanc is a bucket-list item. By taking a day trip, you avoid the exorbitant hotel costs of Chamonix itself. For more ways to navigate this area, you can learn about visiting Mountain Mont Blanc without the crowd.
Day 5: La Fouly and the Val Ferret
Cap off the week in one of the most picturesque valleys in Switzerland.
- The Route: Take the bus to La Fouly. Hike the “Sentier des Bergers” (Shepherd’s Trail) along the valley floor, passing traditional dairy farms and rushing glacial streams.
- Trail Type: Yellow.
- Distance/Time: 9 kilometers / 3 hours.
- Why it works: The imposing face of Mont Dolent (the peak where the borders of Switzerland, Italy, and France meet) dominates the skyline, but the trail itself is flat and forgiving.
Trip 2: The Gstaad & Simmental Valley Circuit
Best for: Classic rolling green hills, wooden chalets, cheese farms, and easy access to glaciers.
Basecamp: St. Stephan (Simmental Valley).
Duration: 5 Days
The Simmental valley, leading up to the upscale resort area of Gstaad, represents the quintessential “Heidi” landscape of Switzerland. It is incredibly green, dotted with Simmental cows, and features softer, more forgiving terrain than the jagged peaks of the Valais or Jungfrau. Basing in a village like St. Stephan offers excellent train connectivity and affordability.
Day 1: The Lenk Waterfalls Walk
- The Route: Take the train short distance from St. Stephan to Lenk. Walk from the village center up to the Simmenfälle (Simmen waterfalls), and continue up the forested path to the spectacular Iffigfälle.
- Trail Type: Yellow with some Red/White sections near the upper falls.
- Distance/Time: 10 kilometers / 3.5 hours.
- Why it works: Waterfalls make excellent focal points for beginner hikes because the trails usually follow the natural contour of the river valley. The climb to Iffigfälle gets your heart rate up but remains technically simple.
Day 2: Glacier 3000 and the Peak Walk
- The Route: Take the bus from Gstaad up to the Col du Pillon, then ride the massive cable car up to Glacier 3000.
- Action: Walk across the Peak Walk by Tissot (a suspension bridge connecting two mountain peaks), then do the Glacier Walk—a groomed, flat path across the glacier snow to the Quille du Diable viewpoint.
- Why it works: Walking on a glacier usually requires crampons, ice axes, and a rope team. Glacier 3000 grooms a wide, safe path through the snow, allowing absolute beginners to walk across a high alpine glacier in standard winter boots.
Day 3: The Wispile Ridge Walk
- The Route: Take the cable car from Gstaad up to Wispile. Walk the panoramic ridge trail towards the Chrine Pass, then descend to Lauenensee (Lake Lauenen).
- Trail Type: Red/White.
- Distance/Time: 9 kilometers / 3.5 hours.
- Elevation Profile: Mostly downhill. You start at 1,900 meters and end at 1,380 meters.
- Why it works: This is the ultimate example of the cable car hack. You get 360-degree views of the Bernese Alps while walking along a grassy ridge, followed by a descent to a picturesque mountain lake where you can swim before catching the PostBus back.
Day 4: Excursion Day – Oeschinen Lake Loop
- The Route: Take the train through the Lötschberg tunnel to Kandersteg. Ride the gondola up to Oeschinensee. Hike the Lake Oeschinen Loop, widely considered one of the best trails in Switzerland for panoramic lake views.
- Trail Type: Red/White.
- Distance/Time: 8.5 kilometers / 3 hours.
- Why it works: The trail rises above the intensely blue glacial lake, offering spectacular photo opportunities. The path is a proper mountain trail with some elevation gain, serving as a great confidence builder for beginners who have spent a few days warming up on easier routes.
Day 5: Zweisimmen to Rinderberg
- The Route: Take the gondola from Zweisimmen to Rinderberg. Hike the high-altitude trail down to St. Stephan.
- Trail Type: Red/White.
- Distance/Time: 8 kilometers / 2.5 hours.
- Why it works: This is a classic descent trail. You enjoy lunch at the mountain house at the top, then take a leisurely afternoon hike straight down into your basecamp village.
Trip 3: The Jungfrau Region Panoramic Route
Best for: Quintessential massive peaks (Eiger, Mönch, Jungfrau), massive waterfalls, and iconic Swiss villages.
Basecamp: Grindelwald or Lauterbrunnen.
Duration: 3 Days
The Jungfrau region is globally famous. The infrastructure here is arguably the most developed in the world, meaning cable cars run parallel to almost every section of trail.
Day 1: First to Bachalpsee Loop
- The Route: Take the gondola from Grindelwald up to First. Follow the wide, well-graded gravel path to the mirror-like Bachalpsee lake, then return to First and ride the gondola down.
- Trail Type: Yellow / Easy Red/White.
- Distance/Time: 6 kilometers / 2 hours.
- Why it works: This is the most famous beginner hike in the region. The path is wide enough for off-road strollers, yet the views of the Schreckhorn and Wetterhorn peaks are world-class.
Day 2: The Panorama Trail (Männlichen to Kleine Scheidegg)
- The Route: Ride the gondola from Wengen or Grindelwald up to Männlichen. Walk the flat ridge trail facing the Eiger North Face directly to the Kleine Scheidegg train station.
- Trail Type: Yellow.
- Distance/Time: 4.5 kilometers / 1.5 hours.
- Why it works: You are staring at one of the most famous rock faces in mountaineering history while walking on a flat, perfectly groomed path. At Kleine Scheidegg, you hop on the famous cogwheel train to descend.
Day 3: Lauterbrunnen Valley Floor Walk
- The Route: Walk from Lauterbrunnen village along the valley floor to Stechelberg, passing dozens of waterfalls including the famous Staubbach Falls.
- Trail Type: Yellow (Paved pedestrian path).
- Distance/Time: 7 kilometers / 2 hours.
- Why it works: The Lauterbrunnen Valley hike is a flat pedestrian path that goes directly through the “Valley of 72 Waterfalls” [4]. It is highly accessible, zero-stress, and perfect for a rest day or rainy weather when high-altitude trails are clouded over. Interlaken is nearby, where you can mix up your activities with a kayak tour or a visit to local restaurants [3].
If you fall in love with the area, you can easily look into the best hiking trails in Switzerland near Mont Blanc to plan your next regional jump.
Trip 4: The Cross-Border Day Trip (Aosta Valley)
Many beginner hikers base themselves in southern Switzerland specifically for the ability to cross into Italy.
If you are staying in the Valais (like Liddes), you are just a tunnel or pass away from the Aosta Valley in Italy. While often associated with winter sports—you might wonder if you can go skiing in the Italian Alps on an Aosta day trip—the summer hiking is equally spectacular and distinctly different from Switzerland.
Taking a day trip to Courmayeur or Aosta allows you to experience Italian alpine culture (and cheaper espresso). The Val Ferret on the Italian side of the Mont Blanc massif features entirely flat walking paths that track the river, offering towering views of the Grandes Jorasses without requiring any uphill struggle.
5 Common Mistakes Beginner Hikers Make in Switzerland
Even with perfectly planned routes and world-class infrastructure, beginners frequently fall into a few preventable traps.
1. Misunderstanding the Trail Time Estimates
Swiss trail signs list time, not distance (e.g., “Bachalpsee 1h 10m”). These times are calculated based on the walking speed of a fit, acclimatized adult walking without stopping. They do not account for water breaks, catching your breath, taking photographs, or eating lunch.
The Fix: As a beginner, always add 30% to 50% to the time listed on the yellow trail sign.
2. Missing the Last Cable Car
If you take a cable car up the mountain to hike a high ridge, you must know exactly when the last cable car descends. Mountain railways do not wait for stragglers. If the last gondola leaves at 17:15 and you arrive at 17:20, you will be walking down 1,500 vertical meters in the dark.
The Fix: Set an alarm on your phone for your turnaround time. Always build in a one-hour buffer before the last descent.
3. Overpacking the Daypack
Because beginners fear the alpine environment, they often pack for an Everest expedition. Carrying a heavy 40-liter backpack on a 3-hour walk will destroy your shoulders and throw off your balance on uneven terrain.
The Fix: Stick to the essentials. You need two liters of water, a rain shell, a fleece mid-layer, sunglasses, sunscreen, snacks, and a basic first aid kit. A 20-liter pack is more than enough. Reviewing a Swiss Alps summer packing guide will save you significant back pain.
4. Ignoring the Half-Fare Travel Card
Swiss transport is incredibly efficient, but paying full price for every cable car and train will destroy your travel budget in days.
The Fix: Purchase the Swiss Half Fare Card (valid for a month) before your trip. It cuts the cost of almost every train, bus, and cable car in the country by 50%. It typically pays for itself within the first two days of cable car rides. To save even more money, review tips for hiking in Switzerland without the high cost.
5. Stepping off the Trail for Cattle
Cows are a ubiquitous part of the Swiss alpine landscape. Many trails cut directly through active summer pastures. A common beginner mistake is either approaching the cows to pet them (especially calves) or stepping off the trail into steep, uneven terrain to avoid them.
The Fix: If cows are blocking the trail, give them a wide berth, move slowly, and do not make sudden noises. Never get between a mother cow and her calf.
Making It Social: The Group Holiday Advantage
Planning a structured itinerary, managing SBB train schedules, interpreting trail signs, and packing lunches can feel overwhelming for a solo traveler or someone organizing a trip for the first time.
This is why organized week-long hiking holidays based in social hostels have become the gold standard for budget-conscious hikers. By booking a package with a dedicated hiking hostel (like those based in Liddes or St. Stephan), the logistics evaporate.
- Pre-planned Routes: You wake up, eat breakfast, and are handed a perfectly structured itinerary for the day based on the weather.
- Transport Included: Daily trail transport drops you at the trailhead and picks you up, saving you from navigating rural bus schedules.
- Built-in Friends: You hit the trail with a ready-made group of solo travelers, backpackers, and digital nomads.
- Cost Control: With accommodation, meals, and transport bundled, you know exactly what the week will cost upfront.
If you prefer wheels over walking boots, these social hubs also make it incredibly easy to find the right mountain bike group for alpine trails on your rest days.
Frequently Asked Questions (FAQ)
Do I need specialized hiking boots for beginner trails in Switzerland?
If you are sticking exclusively to yellow-marked paths (Wanderweg), sturdy trail running shoes or comfortable athletic sneakers are sufficient. If you plan to hike any red-and-white mountain trails (Bergwanderweg), you absolutely need trail shoes or hiking boots with deep lugs for traction on loose rocks and mud.
Is altitude sickness a risk on beginner Swiss itineraries?
Altitude sickness typically becomes a risk above 2,500 meters (8,200 feet). Most beginner basecamps are located between 1,000 and 1,500 meters, and most trails cap out around 2,000 to 2,200 meters. While you may feel more winded than usual on ascents, acute mountain sickness is very rare on these lower trails. If you take a cable car to an excursion point like Glacier 3000 or the Aiguille du Midi, drink plenty of water and move slowly.
Can I drink the water from the streams?
Switzerland has thousands of public fountains in villages and along popular trails that provide clean, icy drinking water. Unless a fountain specifically says “Kein Trinkwasser” (Not drinking water), it is safe. However, do not drink directly from alpine streams or rivers, as cattle graze above most trails and contaminate the runoff.
When is the best time of year for a beginner hiking trip?
The absolute best window is from late June through mid-September. Before mid-June, many high-elevation trails are still buried in snow, and cable cars may be closed for maintenance. By late September, early snowstorms can abruptly end the hiking season.
The Final Step
The Swiss Alps are not locked behind a wall of elite mountaineering skills. With a smart basecamp strategy, a healthy respect for trail signage, and the strategic use of cable cars, the highest, most dramatic peaks in Europe are open to everyone. Whether you build the itinerary yourself or join a vibrant, organized group at a hiking hostel to handle the logistics, your first alpine hiking trip is closer than you think.